What is "Pop Art?"


Andy Warhol


|

|
How to create?
Simple Steps:
- Open your program
- Create a new workspace that is 8x10 or 10x8” (if you would like to create a square use 10x10).
- In Gravit to File<Import<Place Image or Drag and Drop- In Illustrator go to File>Open> Then drag onto your document!
- Find your reference image(s).

|
|
- Photoshop if necessary then "Posterize."

|

|
- Position your photo in the center of your workspace and enlarge it to fit the space.
- Lock the layer in place.
- Create a new layer over to begin and "hide/create new layer"as needed!
Planning:
(Use your digital sketchbook- items in purpose coorespond with your planning steps)
1. CHOOSE A TOPIC
Brainstorm
What is your design going to be about? What is the purpose of your design?
Answer each of the questions provided under planning phase 1 when applicable.
This is a portrait but think beyond that! What mood or emotion are you going to portray? Are there any messages you are going to incorporate into your piece through imagery or symbolism? How will your design be unique?
2. DECIDE ON A SPECIFIC STYLE YOU WOULD LIKE TO WORK IN!
Trending styles!
Artist Technique
“Style” Research Images
Students should find at least 3 successful graphic designs created in a similar style to what they intend to use on their assignment. Additional non graphic design style references are welcome.
Check out some of the following searches in google to get ideas for your own piece- save at least 3 that you like:
Vector Portraits
Illustrator Portraits
Pop Art
Pop Art Portraits
Vector Portraits
Illustrator Portraits
Pop Art
Pop Art Portraits
3. FIND EXAMPLES THAT INSPIRE THE PLACEMENT OF YOUR CHARACTER AND BACKGROUND OF YOUR DESIGN.
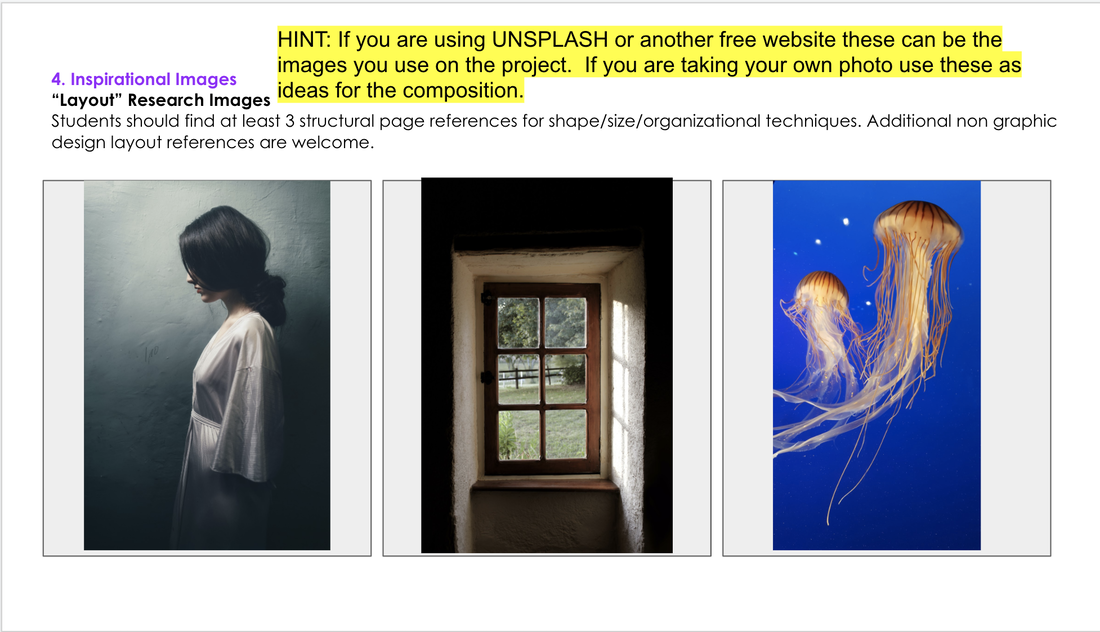
Inspirational Images
“Layout” Research Images
Students should find at least 3 structural page references for shape/size/organizational techniques. Additional non graphic design layout references are welcome.
5. SKETCH OUT A PLAN.
Idea Development
(sketch/drawings) Students should plan out a sketch demonstrating layout and placement of items within the design space.
On a piece of paper or using a drawing program on the computer- create a rough sketch of what your final design will look like. Consider the rule of thirds, creating depth in your space, and visual hierarchy as you construct this alignment.
TIP!!!
POSE CAN MAKE OR BREAK YOUR DESIGN- CONSTRUCT FEELING! |
|
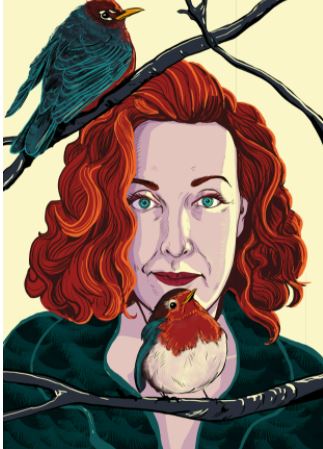
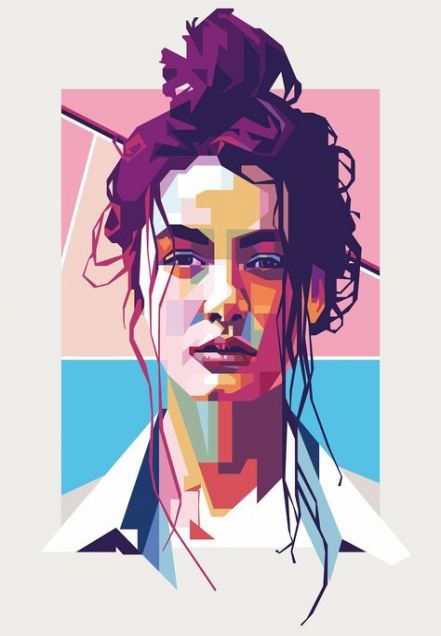
Student Examples:

|

|

|

|

|

|

|

|

|

|

|

|

|

|

|
Professional Examples:
Notice the great use of space and interaction between the subject and background:

|
|

|

|
Notice how "stroke" lines can help give it a more cartoon feel:

|

|

|

|
Notice the different types of shapes used to create the values in each:

|
|

|

|
Artists to Know!

|


|


|

|
Brionya James

|

|

|

|

|

|

|

